The Studio Sound Myth: Recording Does Not Erase the Room
Recording does not erase the room: learn when room character helps a performance, when it distracts, and how to choose a recording approach that fits.
A handclap rings across a tiled kitchen, then dies quickly in a carpeted bedroom. Recording does not erase the room: a microphone captures those differences along with the performance. The useful question is whether the room’s sound serves the music.
That choice depends on the source, the room and how much control you want later. A resonant space can give a voice or instrument a sense of place; a noisy or sharply reflective one can crowd it. Listen to the source in the room before reaching for a plug-in or booking somewhere else.
Choose a live room when its character belongs in the performance
Some sounds gain meaning from the space around them. A singer may want the gentle bloom of a wooden room, while a hand drum may benefit from short reflections that add body. In those cases, the room is part of the sound the performers are making.
Listen for the quality of reflections, not only how long they last. A room may sound warm, bright, boxy, diffuse or spacious. Handclaps from different positions can reveal broad differences, but they cannot tell you exactly how a microphone will hear a particular source. Play or sing the material in the room and listen from a likely microphone position.
A live room can work well when its reflections support the performance’s timing and mood. A choir may blend naturally in a generous space, and a drum kit may sound cohesive when the room gives its close microphones a shared acoustic setting. The trade-off is that the captured room sound can be hard to remove without affecting the direct sound.
Use a room microphone only when you hear a useful contribution in context. A distant microphone does not automatically make a recording more spacious; it can make the source less direct while bringing up unwanted room noise. Listen with the full arrangement playing, since a reflection that flatters a solo voice may blur a busy mix.
Choose a controlled room when clarity and editing matter most
A dry, controlled recording is often a useful starting point for close, detailed material. Spoken vocals, layered backing parts, tight percussion and instruments that will be heavily processed can benefit from fewer audible reflections. The aim is not to remove all character, but to avoid committing to room effects that conflict with later decisions.
Home recording does not require an acoustically perfect studio. Curtains, rugs, bookshelves and soft furnishings may reduce reflections, though the result depends on the room’s layout and the source. Keep the microphone away from obvious hard surfaces where practical, and listen for a sharp slap, a hollow ring or fluttering echo between parallel walls.
Covering every surface with foam is not a universal fix. Thin foam can reduce some high-frequency reflections while leaving lower room resonances largely unchanged. Thoughtful adjustments and a quieter recording position may help more than covering walls indiscriminately.
Choose a controlled room when you expect to layer takes, edit timing or place the source in a different acoustic setting later. A closer, drier capture usually leaves more options for adding reverb or delay in a mix. The room has not vanished; its sound is simply less prominent.
Move when the room fights the source
Traffic through a window, loud ventilation, a persistent low hum or a sharp reflection can make a room difficult to use. If moving the microphone or performer does not make the sound usable, a different space may be the simplest solution.
Listen while the source is playing, then pause and hear what remains. Noise between phrases can be easier to identify in a quiet moment, while a room resonance may stand out on one pitch and disappear on another. If the room adds a sound that clashes with the part, try a quieter or less reflective space before relying on repair tools.
A room need not be rejected because it is small or ordinary. A bedroom, rehearsal room or community hall can suit a recording if its noise and reflections fit the material. Decide from what you hear, not from the room’s label or appearance.
Keep useful room sound under control
If you like the room but want a more focused sound, treat microphone placement as a listening choice. Move the microphone and source relative to the walls, then compare the sound through headphones or monitors. A small change can alter the balance between direct sound and reflections, but it cannot make an unsuitable room acoustically neutral.
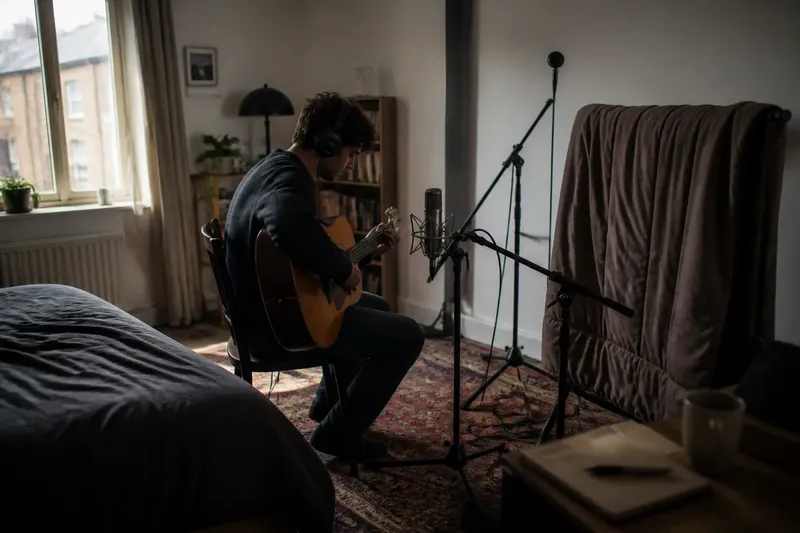
Say you are recording a quiet acoustic guitar in a spare bedroom, and a hard wall makes the upper strings sound brittle. You move the player and microphone farther from that wall, put a thick duvet over a nearby reflective surface and record the same short passage again. If the new take sounds less sharp while retaining the guitar’s body, keep that arrangement; if it sounds dull or boxy, remove the duvet or try another position.
When you want a sense of space without all the reflections, record a close microphone and a room microphone as separate signals if your setup allows. Keep the close sound prominent and blend in only as much room as suits the arrangement. Check the combined sound for phase-related changes, since signals from different microphone positions can reinforce or weaken parts of the tone.
With a single microphone, balance detail against room sound. Closer placement generally makes the direct source more prominent, while greater distance usually brings more of the room into the recording. The source and microphone also shape the result, so listen rather than treating distance as a fixed recipe.
Which room-recording choice fits your situation?
Can I add room sound later?
Reverb and other spatial effects can create a sense of space after recording, but they do not reproduce every detail of a particular room. A dry capture gives you more freedom to choose an artificial acoustic setting; a room microphone captures its own reflections and noise.
Can I remove room sound after recording?
Editing tools can reduce some unwanted noise and reverberation, but removing room sound cleanly is not always possible. If the room is strongly audible beneath the source, try a better microphone position or a different space before recording.
Should every instrument use the same room?
No. A room that gives a drum kit coherence may make a close vocal feel distant, while a dry space may suit layered parts better than a sustained solo instrument. Choose for the source and arrangement rather than imposing one acoustic character on every track.
Does a treated room always sound better?
Treatment can reduce reflections or resonances, but the aim is a useful sound, not the absence of all room character. Listen to the source in context and decide whether the remaining space helps the performance.
Match the room to the musical intention
Before recording, name the quality you want: intimate, spacious, blended, dry or natural. Then ask whether the room already provides it. If it does, capture enough of that sound to matter; if not, keep the room quieter in the signal and shape the space later.
Recording does not erase the room, but you can choose how much of it reaches the listener. A useful room can give a take its identity, while a distracting one can narrow your choices. When considering recording room character, compare the same short passage from two microphone positions or two available spaces, then keep the version that supports the music rather than the one that merely sounds larger.